Saturday, July 28, 2012

【Lazy Bear's Recipes】Mentaiko Pasuta 明太子パスタ

This morning a friend asked me, "don't you think it's hard to find time to cook?" I do, but truth is, I can't eat out all the time anymore. Not that I don't enjoy going to restaurants and the company of family and friends over dinner, but usually after a few consecutive nights of eating out, my body will start to complain. I guess I'm getting old.

Last week I spent many late nights in the office and by the end of the week I was so sick and tired of eating takeouts I just couldn't take it anymore. I dragged my tired self to the grocery store just before closing and bought the ingredients to make a 30-minute meal.  My go-to recipe of late is the Mentaiko Pasuta 明太子パスタ, pasta with spicy cod roe.

And no, I didn't spell the word pasta wrong.  Pasuta (パスタ) is the Japanese spelling of the word and obviously this fusion dish is all about harmonizing Italian pastas with Japanese ingredients.  The best thing is that this dish is super easy to make, something that you can literally throw together in 30 minutes from start to finish, and if I'm really hungry that includes eating and cleaning up as well.

What's better than having hot, delicious homemade food after a long day of work?  Starting from this post, I am going to bring you a series of what I call the "Lazy Bear's Recipes", for all of you who also enjoy a little home cooked dinner, without having to slave in front of the stove for hours after a long day at work. I hope you like them. =)


Serves 4
Difficulty: Low

Ingredients:
1 packet mentaiko (usually has 2 to 3 sacs)
2 tablespoon unsalted butter
2.5 tablespoon Japanese Kewpie mayonnaise
1/4 cup of cream
1/4 teaspoon black pepper
1/4 sheet nori, cut into thin strips
6 leaves of green shiso, sliced very thin
170 grams sphaghetti pasta

Method:
1. Cook the pasta in salted water in a large pot according to the instructions on the package, usually about 10 minutes.
2. Meanwhile, cut each mentaiko sac in half and scrape out the roe from each into a mixing bowl, discarding the membrane.
3. Add melted butter, cream, mayo and black pepper to the bowl and mix well.
4. When the pasta is done, drain and add it to the mentaiko sauce.  Toss the pasta until every strand of it is coated with the sauce evenly.
5. Plate the pasta and sprinkle some nori and shiso strips over it.  Serve immediately.

See I told you? This is almost as easy as instant noodles!

Quick tip: Since this is the "Lazy Man's Recipe", I am going to share with you my quick trick of melting the butter.  Instead of using another saucepan or putting it in the microwave (by the way, Mrs. Bear does not own a microwave), put a pair of long chopsticks horizontally over the pasta pot and put the butter in a small bowl on top of the chopsticks while you're cooking the pasta.  The heat from the pot will melt the butter instantly!  This saves energy and saves you from washing another saucepan!

Monday, July 23, 2012

[Shinya Shokudou - Chapter 7] Tomatoes Wrapped in Pork Belly

The assignment for this week's Shinya Shokudou cooking club is Tomatoes Wrapped in Pork Belly (五花肉蕃茄卷 or 豚バラトマト巻き). I'm glad that it's a simple challenge as I had been clocking quite a number of overtime hours at work this week. The dish itself is really nothing more than what the name suggests - you wrap tomatoes with pork belly slices and you grill them up, that's it. The tomato becomes soft and sweet after grilling and the natural fat from the pork belly actually enhances the flavour. They are always a crowd pleaser whenever we serve them at our family BBQ. Some people like to use bacon instead of pork belly slices because in that case you don't even have to worry about seasoning. To make it substantial enough as a dish for dinner tonight I threw in some leeks and Japanese green peppers I had in the fridge since I'm already firing up the oven anyway.


Ingredients: 
Cherry tomatoes 
Pork belly, thinly sliced 
A dash of salt and black pepper 
Bamboo skewers 

Method: 
1. Place bamboo skewers in water to soak. 
2. Cut the pork belly strips into half-length. Put the cherry tomato towards the end of the pork belly strip, wrap tight and thread them onto the skewer. Season with salt and pepper. 
3. Heat up the oven to 200C and grill until the pork belly turns brown and crisp, about 5 minutes on each side. For better results, use a grill (with medium high heat) Serve immediately.

Let's check out the other members' dishes this week!


為食二人組


Friday, July 20, 2012

Banana Bread

I have tried many banana bread recipes in the past and was not able to find the perfect one. A while ago, I saw a recipe from 偽主婦ki琪’s blog and she mentioned that it came from her brother who is a pastry chef at a 5 star hotel. I made a big batch using this recipe last weekend and I don’t think I’ll look much further for another one. This banana bread is moist and delicious with loads of banana flavor! As opposed to the other banana bread recipes I’ve used, this one uses the muffin method by melting the butter instead of creaming which gives a dense and chewy texture. The original recipe uses only granulated sugar. By the time I was onto the fifth loaf, I ran out of white sugar so I did a little experiment by substituting half of it with brown sugar. We sampled both versions, the one with brown sugar is more moist and rich in flavor and the one with white sugar is more dense and light in flavor. Both were very good, so I guess it just comes down to a matter of preference of what you like more. 

偽主婦ki琪’s blog has step-by-step instructions with pictures in Chinese, but for those who can’t read Chinese, I’ve translated the recipe for you here. Thank you 偽主婦ki琪 for the amazing recipe – it’s definitely a keeper!


Ingredients: 
2 1/2 ripe bananas (偽主婦ki琪’s recipe asks for 2 bananas but Mr. Bear requested for more so I threw in an extra half.) 
100g unsalted butter 
100g white sugar (or 50g white sugar + 50g brown sugar) 
3 egg yolks 1 tablespoon lemon juice 
1 tablespoon rum 100g plain flour 
50g bread flour 
1 teaspoon baking soda 
1 teaspoon vanilla extract 
2 egg whites 

Method: 
1. Preheat oven to 170C. 
2. Mash bananas in a large mixing bowl until well-blended. Add in the lemon juice and mix well. 
3. Melt butter in a small saucepan over medium heat. 
4. Add sugar, butter, egg yolks, rum, and vanilla extract into the banana mixture and whisk them together. 
5. Add sifted dry ingredients into the mixture to form the batter. 
6. In a separate bowl, beat the egg whites until stiff peaks form. 
7. Add 1/3 of the egg white into the batter and mix well, then fold in the rest of the egg white. 
8. Lightly butter bread loaf pans and pour the banana mixture in. 9. Bake at 170C for 30-40 minutes, or until a wooden toothpick inserted in the center comes out clean. The tops of the loaves should be a nice toasty brown. 
10. Cool loaf in the pan for 10 minutes before removing to a wire rack to cool completely.

Wednesday, July 18, 2012

Homemade Pork Jerky (Bak Kwa)

I have promised my colleague S that I would post the recipe for my homemade bak kwa for a long time but I never got a round to do it.  Since I have a little bit of time tonight, I decided to write about it first among all the other things I want to blog about.

Ever since I was a kid I had always been wondering how pork jerky is made.  Pork jerky is pretty expensive if you buy them in a store so I was under the impression that the process of making it must be very complicated.  It was until I saw my friend J posting her secret recipe on Facebook that I realized I can possibly make this at home too.  All you need is a big oven, a few pieces of parchment paper and saran wrap, a rolling pin, and of course, lots of pork.  I improvised J's recipe a little and here is Mrs. Bear's very own version of bak kwa.  I don't have to go to Bee Cheng Hiang for this anymore!


Ingredients:
500 grams of ground pork
1 tablespoon fish sauce
1 tablespoon dark soy sauce
1/2 tablespoon light soy sauce
1/2 tablespoon oyster sauce
1/2 tablespoon sesame oil
1/2 tablespoon five spice powder
1 tablespoon Hua Tiao wine
1/2 tablespoon Chinese rose wine
a dash of white pepper
1/2 cup of sugar
1 tablespoon of honey, diluted with 2 tablespoons of water

Method:
1. Mix all ingredients (except for honey water) in a large mixing bowl in one direction until the meat turns gluey.  Let the mixture stand in the fridge for at least 4 hours.
2. Preheat oven at 100C.
3. Cut a piece of parchment paper the size of a baking tray.  Place parchment paper on the kitchen counter and put about half the meat on top.  Cover the meat with saran wrap and flatten the meat using a rolling pin to form a thin sheet of 2-5mm, as desired.  Slide the meat (together with the parchment paper) onto the baking tray and peel off saran wrap.  Repeat this step until all the meat is used up.
4. Place baking tray into the oven and bake for 45-60 minutes until the meat is dry and solid to touch.
5. Remove meat from oven and cut into size and shape preferred, using a cookie cutter or pizza cutter.
6. Place cut meat onto a new piece of baking paper or wire rack. Brush honey water over the meat and grill until the pieces turn brown on both sides and the edges slightly charred. Keep your eyes on them because once the honey water is added they get burned very easily.

Note: this pork jerky does not have preservatives, so it’s better to keep them in an airtight container in the fridge and reheat in microwave or oven when needed.

Sunday, July 15, 2012

[Shinya Shokudou - Chapter 6] Buta Kimchi

Inspired by the popular Japanese manga, Shinya Shokudou (深夜食堂), a virtual cooking club was formed by a small group of passionate home cooks.  Shinya Shokudou means "a late night diner" in English. The manga is actually a collection of short stories set in a small eatery only opening after midnight.  It has a standard menu consisting of just a single choice, but the owner will try to cook any dish that the patrons request. The stories revolve around the lives of the patrons and usually one simple local dish is featured in each chapter.

Founded by blogger 偽主婦ki琪, she initially recruited some of her close friends to join exclusively, and now the member base has expanded to over 20 in just 6 weeks! The idea of this cooking club is that all the members will cook the same dish and blog about them on the same day.  The list of predetermined dishes of course comes from the manga but the members are encouraged to come up with their own recipes.  This is like the Iron Chef for the housewives!  The members "meet" virtually every Sunday and today is my first club meeting!!!

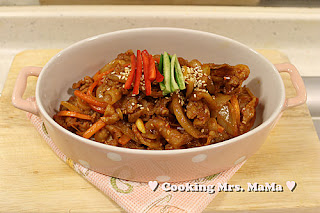
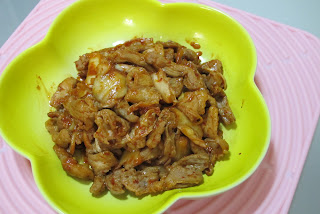
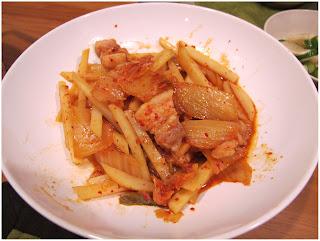
The topic for this week is Buta Kimchi (泡菜豬肉). Known as Jaeyook Bokkeum (재육볶음) in Korea, Buta Kimchi (豚キムチ) is the Japanese rendition of this spicy pork and kimchi dish.  I have always wanted to learn how to make this so I couldn't be more thrilled to find out that is my first Shinya Shokudou challenge.  The problem is, I have never made Japanese dishes at home so I had no idea how to make Buta Kimchi. I was prepared to make this dish every day starting the Monday until it comes out right so I wouldn't be embarrassing myself in front of all these experienced cooks in my first appearance.  Fortunately, it worked out very well the first time and Mr. Bear was very relieved that he doesn't have to eat the same thing every day for the last week.  Here's my Buta Kimchi recipe.  To show my respect to the club, even though this is a simple dish, I bought Kurobuta pork belly slices for it, but I'm sure regular pork would taste just as good. =)


Serves 3
Difficulty: Low

Ingredients:
500g sliced pork belly
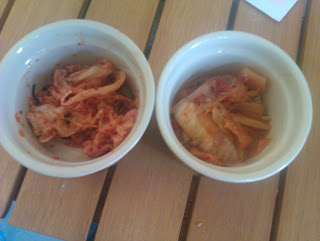
2 cups kimchi, roughly chopped
1/2 onion, thinly sliced
1 tablespoon gochujang (Korean chilli paste)
1 teaspoon soy sauce
1 teaspoon sesame oil
1 teaspoon sugar
2 cloves of garlic, finely chopped
2 spring onions thinly sliced

Method:
1. Heat up a frying pan until very hot and sear the pork belly slices on both sides.  There's no need to add oil since there's enough natural fat in the meat already.  Transfer the meat onto a plate leaving just a tablespoon of fat in the frying pan.
2. Add the kimchi and onion to the frying pan and stir fry for a minute. 
3. Mix the gochujang, soy sauce, garlic and sugar together in a small bowl. Return the pork to the pan along with the seasoning and continue to stir fry until the kimchi turns translucent and the pork becomes tender, about 5-8 minutes. If there’s any extra liquid remaining at the bottom, turn the heat up to high and reduce until the sauce coats the meat and the kimchi. 
4. Turn off the heat, drizzle with sesame oil, sprinkle with spring onions and serve.

p.s. You may have noticed that the title of today's post is Shinya Shokudou - Chapter 6. When I joined this club last week, the other members have already completed five challenges already. 

p.p.s As I was expecting to go through many failed attempts before I could get it right, I bought a lot of kimchi.  I used the leftover kimchi on the next day for Miss G's favourite Korean Tofu Stew, which I will blog about separately.  For the time being, I hope you enjoyed my Buta Kimchi. =)

Let's take a look at other member's cooking!


1. Chairlady 偽主婦的生活日記


2. 阿糕糕CAKE 一CLICK


3. 方家小廚


4. Mrs. Horse Little Workshop


5. 維維媽


6. 為食二人組的喪食足跡


7. Jobe's Cooking


8. 芝士的生活點滴


9. Viviana 英倫廚房筆記


10. 黃金太太廚房的事


11. 玻璃朱城


12. 鬼嫁料理手帳


13. Serendipity


14. OL醉愛廚房


15. WongC9


16. 噹噹


17. 東海堂。拾壹樓


Saturday, July 7, 2012

Espresso Chocolate Cupcakes

My cupcake craving BFF was over for dinner last weekend so I decide to make some homemade cupcakes for her to bring home after dinner.  This was my first time making cupcakes from scratch.  All the previous times I used Sprinkles cupcake mix, which were awesome by the way, but this time I decided to take up a new challenge and I am very happy with the results.  Everyone was saying these cupcakes taste even better than the Sprinkles ones! Yay!!!


The recipe was just something I randomly found on the internet.  Unfortunately, I lost the URL, otherwise I would always cite the orignal source.  Using regular muffin pans, my batter yielded 30 moist and decadent cupcakes.  I don't like my cakes too sweet so as usual, when I adapt a Western recipe I always cut down on the amount of sugar being called for.  If you prefer sweeter cupcakes, you might want to adjust it to your liking.

Makes 30 cakes
Difficulty: Intermediate

Ingredients:
For the cupcakes:
2 cups of hot strong coffee - my coffee maker broke so I had to get it from the nearby Starbucks.  A Grande (16 oz) Americano is exactly 2 cups =)
1 cup unsweetened cocoa powder
2 3/4 cups (11 1/4 ounces) all-purpose flour, sifted
2 teaspoons baking soda
3/4 teaspoon baking powder
1/4 teaspoon salt
250 grams (2 sticks) unsalted butter, softened
1/2 cup granulated sugar
1 1/2 cups brown sugar
1 tablespoon vanilla extract
4 eggs, at room temperature

For the ganache:
350 grams (12 ounces) semi-sweet chocolate (I used 1/3 milk chocolate and 2/3 90% dark chocolate because I love the bitter sweet taste)
3/4 cups heavy cream3/4 cups Hokkaido milk - the original recipe called for 1 1/2 cups of cream and no milk but I think that might be a little too rich so I substitute 3/4 of cream with yummy Hokkaido milk
6 tablespoons for Baileys (or any coffee liqueur of your choice)

Method:
1. Preheat oven to 150°C (300°F).  Line standard muffin pan with paper liners.
2. In a small bowl, mix cocoa powder and Americano coffee until it looks like a smooth chocolate sauces.  Set aside to cool.
3. In a large bowl or stand mixer, cream butter and sugars until nice and fluffy.
4. Add vanilla and eggs one at a time, beating well after each one.  Slowly add flour, baking soda, baking powder, and salt until batter and mix for 2 minutes.
5. Add chocolate-coffee mixture and mix the cake batter for 3 minutes on medium-high or until the batter is smooth.
6. Fill each muffin cup until 2/3 full.  Bake for about 20 minutes.  Check the cake after being baked for 10 minutes to ensure they are in the right shape.
7. Cool in pan for 5 minutes before removing and allow to cool on a wire rack.
8. Meanwhile, in a small saucepan, bring heavy cream and milk to a boil and immediately turn heat off. Add chocolate to the cream, stirring constantly until chocolate ganache is smooth.  Add Baileys and allow ganache to cool.
9. Fill a piping bag with ganache and generously frost each cupcake.

Saturday, June 30, 2012

Chicken Tetrazzini

Mr. Bear and I love Food Network.  When we were in the US last couple of weeks, basically anytime Mr. Bear wasn't watching US Open, the TV was playing some kind of cooking show.  The day before we left, we were watching Giada De Laurenttis making some very delicious looking scones while we were packing.  I was browsing for the recipe of these scones after I came home, and I stumbled across her famous Chicken Tetrazzini recipe that looks too good to pass up.  It has a 5 out of 5 rating with 1041 reviews.  This sure looks promising.


Most reviewers say this recipe is difficult and time-consuming.  I didn't find it particularly difficult, it just has a lot of steps and it's definitely not a 30-minute meal. However, considering a casserole is usually a one-dish meal per se, it's really not that bad. There's a video on the Food Network website showing you how Giada cooks it herself. I followed the recipe pretty much to the letter (I usually do that at least for the first time), but I cut down the portions by half and I had everything done in just a little under 2 hours, including baking time. I did make some slight modifications based on what was available in my pantry though:
  • Penne instead of linguine - I prefer using short pastas for casseroles anyway
  • Panko instead of Italian breadcrumbs
  • Chicken thighs instead of chicken breasts - because Mr. Bear always prefers dark meat
  • Cayenne pepper - added just for a little zest
This is best recipe I've tried from Food Network so far.  It VERY rich and creamy.  Bravo, Giada!

For the portion that I made, I can easily feed 4 people, at least by Asian standards.  Mr. Bear had it for lunch the next day and he said it tasted even better overnight. Try it! And let me know if you like it.

Adapted from Giada Laurentiis' recipe on Food Network

Serves 4
Difficulty: Intermediate

Ingredients
(Amounts are scaled to half of the serving size of the original recipe.  Measurements are converted to metrics to make it easier for those outside of the US)
3 tablespoons butter
1/2 tablespoon olive oil
2 boneless skinless chicken thighs
1 teaspoons salt, plus more for pasta water
1/2 teaspoons freshly ground black pepper 
225 grams (1/2 pound) white mushrooms, trimmed and sliced 
1/2 large onion, finely chopped
3 garlic cloves, minced 
1/2 tablespoon fresh thyme, chopped
1/4 cup dry white wine
3 tablespoons all-purpose flour 
2 cups whole milk
1/2 cup low sodium chicken broth
1/2 cup heavy cream
1/16 teaspoon ground nutmeg
170 grams (6 ounces) dried penne
1/2 cup frozen peas, thawed
2 tablespoons fresh flat-leaf parsley, chopped
1/2 cup grated Parmesan cheese
2 tablespoons Panko


Method:
1. Preheat the oven to 230°C (450°F). Use 1/2 tablespoon of the butter to grease the baking dish. 
2. Melt 1/2 tablespoon of butter and the olive oil in a deep large nonstick frying pan over medium-high heat. Sprinkle the chicken with 1/4 teaspoon of each salt and pepper. Add the chicken to the hot pan and cook until pale golden and just cooked through, about 5 minutes per side. 
3. Transfer the chicken to a large bowl to cool slightly and coarsely shred the chicken into bite-size pieces.
4. Add the mushrooms to the same pan. Sauté over medium-high heat until the liquid from the mushrooms evaporates and the mushrooms become pale golden, about 12 minutes. Add 1/2 tablespoon of the butter. When it melts, add the onion, garlic, and thyme, and sauté until the onion is translucent, about 8 minutes. Add the wine and simmer until it evaporates, about 2 minutes. Transfer the mushroom mixture to the bowl with the chicken.
5. Melt the remaining 1 1/2 tablespoons of butter in another pan over medium-low heat. Add the flour and whisk for 2 minutes. Whisk in the milk, broth, cream, nutmeg, remaining 3/4 salt, and remaining 1/4 teaspoon pepper. Increase the heat to high. Cover and bring to a boil. Simmer uncovered until the sauce thickens slightly, whisking often, about 1 minute.
6. Bring a large pot of salted water to a boil. Add the pasta and cook according to instructions on the package until it is tender but still firm to the bite, stirring occasionally, about 9-10 minutes. Drain.
7. Add the pasta, sauce, peas, and parsley to the chicken mixture. Toss until the sauce coats the pasta and the mixture is well blended.
8. Transfer the pasta mixture to the prepared baking dish. Stir the cheese and breadcrumbs in a small bowl to blend. Sprinkle the cheese mixture over the casserole. Bake uncovered until golden brown on top and bubbly, about 25 minutes.

LinkWithin

Related Posts Plugin for WordPress, Blogger...